This week’s Scrivener Saturday: Meta-Data.
Last week, we covered Keywords, which can be used to help track POV, setting, characters, etc. Scrivener Meta-Data can do the same thing, just a bit differently. I prefer Meta-Data for certain things and keywords for others. For example, I use keywords to track which characters are in a scene as well as information about the scene, but I use meta-data to track multiples.
Using meta-data is great for:
- tracking stories with multiple POV
- tracking stories with multiple timelines
- tracking which plot point the chapter is following
- tracking stories with multiple settings
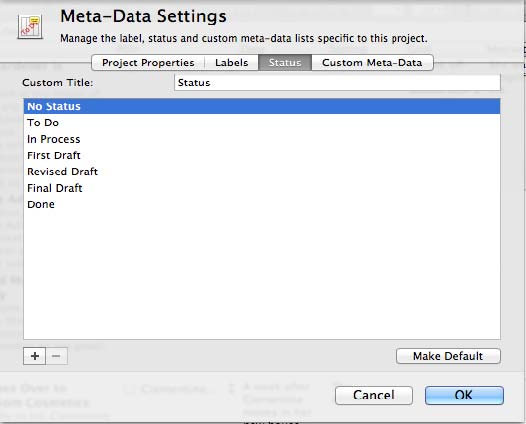
By default, Scrivener uses meta-data to track the Status of a project.
 So based on the image above, you can track the status each scene in your project. You can track this in both the Outliner view and the Inspector (click links for images of both).
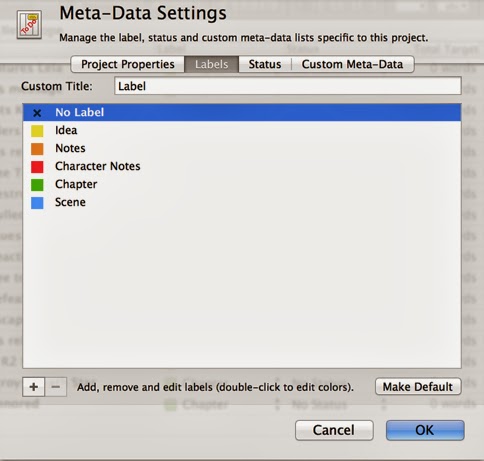
Also by default, Scrivener uses meta-data to track via Labels if a project is an idea, notes, character notes, chapter, or scene.
 Those labels aren’t all that useful for me. If you like them, keep them, but I usually change it. You can see where it says Custom Title that you can change it to whatever you wish. I’ve used it for POV (listing below it my characters whose POV I may jump into), but you can use it to track setting, dates, and countless other things.
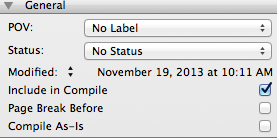
 The image above shows the Inspector view after we’ve made that change. I like this because now I can choose the POV via a nifty drop down menu rather than messing with a keyword. Some folks prefer the keyword method. You’ll also see it this way in the Outliner view if you choose to do so.
[important]Click on the Column List button at the right of the field headers, and a list of meta-data appears. You can check and uncheck whatever you wish to display in the Outliner.[/important]
Beyond this, Scrivener allows you to create custom meta-data, which also shows up in the Inspector and the Outliner views. (You can see an example by clicking on the Outliner link.)
To add custom meta-data,click the Gear button in the top right corner of the custom meta-data tab. (To get to that, simply click on the meta-data tab at the bottom of the Inspector–it looks like a name tag).
Select Edit Custom Meta-Data Settings. You can also access it by choosing Project –> Meta-Data Settings. Click the Add New Meta-Data Field button. When the blank box pops up, type in a name for your field. For example, you could type in Species Name, Setting, or Date. You can also turn on/off word wrap and assign a color to the meta-data. When you click OK to close the pane, your meta-data field will appear in the Inspector. Now you can type in your values for every scene in your project.
So why use custom meta-data?
Keywords don’t list in the Outliner view. If you’re one of those folks who prefers having the Outliner open as you work, you may prefer using meta-data.
Things I often put in my meta-data:
- Setting (physical location of the scene, such as Adelei’s room)
- Date (helps me keep my timeline straight)
- Goal (ties in with Scene & Sequel)
- Motivation
- Conflict (I may use this for internal vs. external, or get more detailed as needed)
- POV (if I don’t change the default as discussed above)
- Scene or Sequel (whether a scene is part of the scene or the sequel)
[important]If you’re not familiar with using Scene and Sequel to control pacing, tension, and plot, I wrote an article on this earlier in the week, which you can read over on Writers Helping Writers. [/important]
I’ve even seen some folks use meta-data to label blog entries (personal entry vs. Flashback Friday column, etc.) while using Scrivener to keep track of their blog. There are many uses for meta-data, so use it how it best works for you.
What I Love about This Feature: It’s a flexible way to keep track of your project data. Using it helps me stay consistent in stories with lots of characters, settings, and POV.
Downside to This Feature: The first time, you have to set it up, which can be time consuming. After that, if you save your settings as part of a custom template (more on that in the future), you’ll never have to set it up again.
Check out the whole series of Scrivener Saturday posts here.


Great post!
I think I may have to give this function another try. I used it once for the status aspect but then never really looked at it again. Thanks for some usage ideas!
No problem! I’m sure there are even more ways to use it than I know. Curious to see if anyone else has an opinion to add. 🙂
LeetahBegallie No problem! I’m sure there are even more ways to use it than I know. Curious to see if anyone else has an opinion to add. 🙂